
If you’ve decided to move away from Evernote, the hardest part usually isn’t choosing a new app—it’s making sure the knowledge you’ve built up over time comes with you. Notes, attachments, images, tags, links, and years of accumulated information can make an Evernote migration feel more complicated than simply exporting a few files.
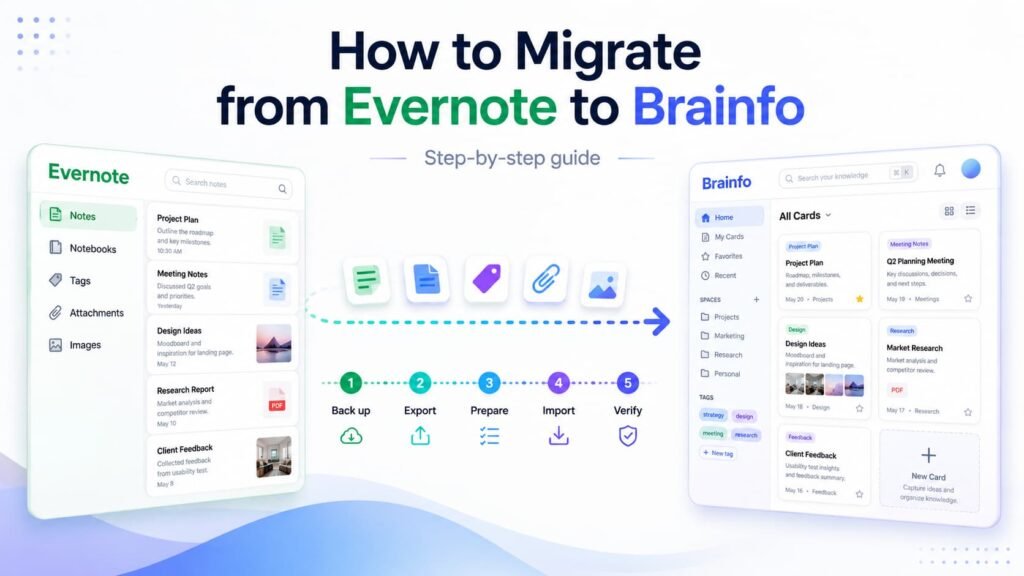
The safest approach is to treat migration as a process rather than a single action: back up your data, export your content, prepare it, import it into Brainfo, reorganize your knowledge, and verify the result before you leave Evernote behind.
This guide walks through that process step by step.
Before You Start: What to Know About Evernote Migration
Before moving anything, take a moment to understand what you’re actually migrating.
An Evernote library may contain much more than text notes. Depending on how you use Evernote, you may have notebooks, tags, attachments, images, links, and other pieces of information that are important to your workflow.
That means a successful migration isn’t simply about getting your notes into a new application. You also need to make sure the information remains usable after the move.
A few principles can make the process safer:
The goal is simple: move your knowledge without losing control of it.
What You Need Before Migrating from Evernote to Brainfo
Before starting your migration to Brainfo, prepare the following:
You don’t necessarily need a dedicated Evernote migration tool if the export and import formats you’re working with are compatible. The important thing is to understand the format of your exported data and the format accepted by your destination.
If your Evernote export requires conversion before it can be imported into Brainfo, handle that conversion before attempting a full migration.
Step 1: Export Your Notes from Evernote
The first step is to get your information out of Evernote while keeping the original data intact.
Choose What You Want to Migrate
You don’t always need to move everything.
Start by reviewing your Evernote library and identifying:
- Notes you actively use
- Important reference material
- Project-related information
- Notes containing valuable attachments
- Frequently accessed documents
- Historical information you still need
You may also find old duplicates, temporary notes, or outdated information that doesn’t need to become part of your new knowledge base.
Migration is a good opportunity to reduce unnecessary clutter rather than automatically carrying your entire digital history into a new system.
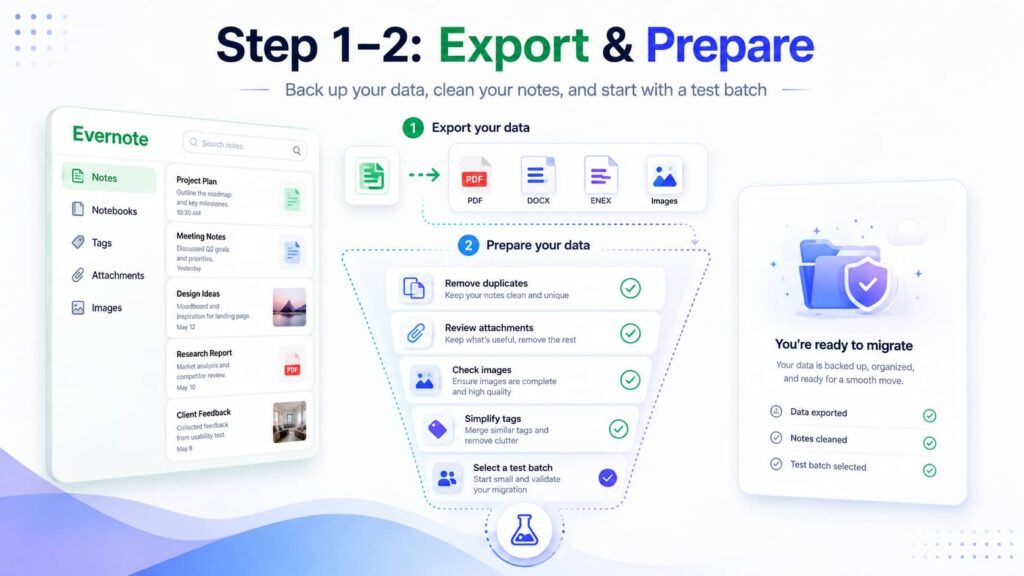
Export Your Evernote Data
Use Evernote’s current export functionality to create a copy of the content you want to move.
The exact export options can depend on the version and platform you’re using, so verify the available formats in your current Evernote installation before beginning.
Pay particular attention to:
- Notes
- Notebooks
- Tags
- Attachments
- Images
- Links
- Formatting
Don’t assume that because the text of a note exported successfully, every element inside that note will behave exactly the same way in the destination.
Keep Your Original Data as a Backup
This is one of the most important rules of an Evernote migration:
Don’t delete your original Evernote data after exporting it.
Keep the original library or export safely stored until you’ve verified the migration in Brainfo.
That gives you a fallback if you discover missing notes, broken attachments, formatting problems, or other issues during the verification process.
Step 2: Prepare Your Evernote Export
Once you’ve exported your content, don’t immediately move everything into Brainfo.
First, prepare the data.
Remove Unnecessary Notes
Look for:
- Duplicate notes
- Outdated information
- Temporary notes
- Empty notes
- Content you no longer need
This can significantly reduce the amount of work involved in organizing your new knowledge base.
Instead of thinking only about how to move Evernote notes, think about which notes are actually worth moving.
Check Attachments and Images
Attachments deserve special attention because they can be more difficult to verify than plain text.
Identify notes that contain:
Keep a list of particularly important files so you can manually verify them after import.
Review Tags and Organization
Evernote’s existing structure may not perfectly match the way you want to organize information in Brainfo.
Before migrating, review your tags and notebooks.
Ask:
- Which tags are still useful?
- Are some tags duplicates?
- Can several categories be simplified?
- Which groups of notes belong together?
You don’t have to reproduce every part of your old structure exactly.
Start with a Small Migration Batch
This is one of the safest ways to approach a large migration.
Choose a representative sample containing different types of content—for example:
Import this smaller batch first.
If something doesn’t work as expected, you’ll discover the problem before you’ve migrated your entire library.
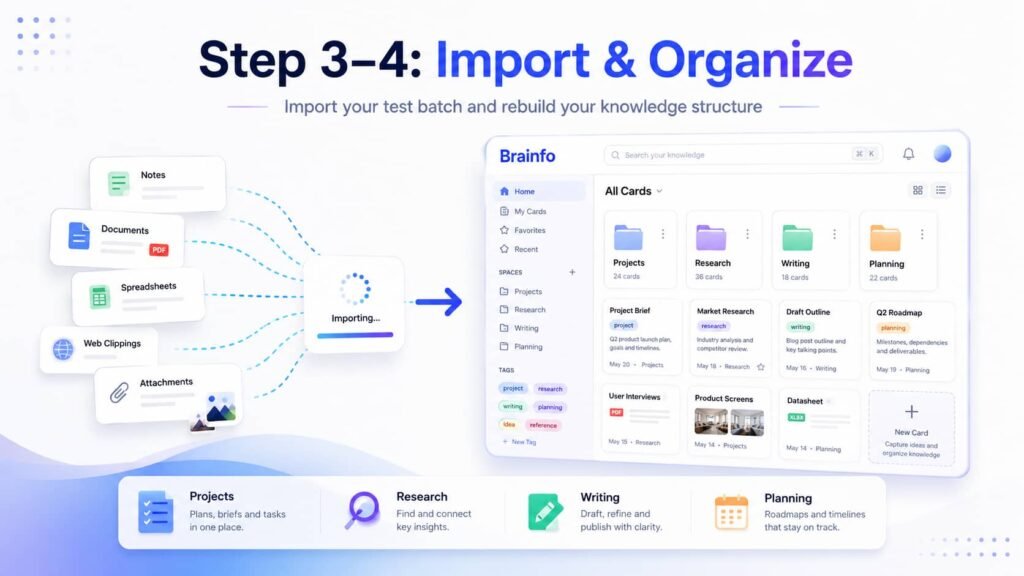
Step 3: Import Your Content into Brainfo
Once your content has been prepared, the next step is importing it into Brainfo.
Before doing a full import, check the current Brainfo import capabilities and make sure your exported format is supported.
Brainfo’s published product information describes import/export capabilities and support for formats including Markdown, Word, and TXT. However, the exact workflow for moving an Evernote export into Brainfo should be verified against the current product workflow before publishing a detailed UI walkthrough.
Check the Supported Import Format
Your first question should be:
Can the format produced by my Evernote export be imported directly into Brainfo?
If yes, you can proceed with the supported import workflow.
If not, you’ll need to convert the exported content into a compatible format before importing it.
Don’t skip this step. A format mismatch can create unnecessary problems later.
Import Your Test Batch
Start with the small group of notes you prepared earlier.
Import them into Brainfo and check the result before moving on to the rest of your library.
Look at:
If the test batch looks correct, you have much more confidence moving on to a larger migration.
Verify the First Imported Notes
Don’t wait until every note has been imported.
Open several of the imported notes immediately and compare them with their originals in Evernote.
Choose different types of notes rather than checking only simple text.
The goal is to catch problems early.
Step 4: Rebuild Your Knowledge Structure in Brainfo
A migration is also an opportunity to rethink how your knowledge is organized.
Your Evernote structure may have evolved over years. It might contain outdated notebooks, overlapping tags, and categories that no longer reflect how you work.
Rather than copying every organizational decision from Evernote, consider building a simpler structure in Brainfo.
Organize Your Notes
Group related information logically and make frequently used content easy to find.
Your new structure should reflect how you actually work today—not necessarily how you worked several years ago.
Recreate Useful Tags and Categories
Don’t automatically recreate every old tag.
Prioritize tags that help you:
Review Projects and Folders
If your migrated content relates to ongoing projects, make sure the organization in Brainfo supports those workflows.
This is especially useful for knowledge workers who use their notes as part of larger research, writing, planning, or project-management processes.
Check Links Between Documents
If your notes contain internal or external links, test the ones that matter most.
A note may appear complete while still containing links that no longer work correctly after migration.
Step 5: Check Your Migrated Content
After importing your content, perform a structured review.
| Item | What to Check |
| Notes | Is the content complete? |
| Attachments | Do important files open correctly? |
| Images | Are images displayed properly? |
| Tags | Is the information still organized logically? |
| Links | Do important URLs still work? |
| Formatting | Is important formatting usable? |
| Structure | Are notes organized where you expect them? |
Don’t rely on a single spot check.
Review both ordinary notes and the content you consider mission-critical.
Step 6: QA Your Evernote Migration
Migration QA is the step that determines whether you’re actually finished.
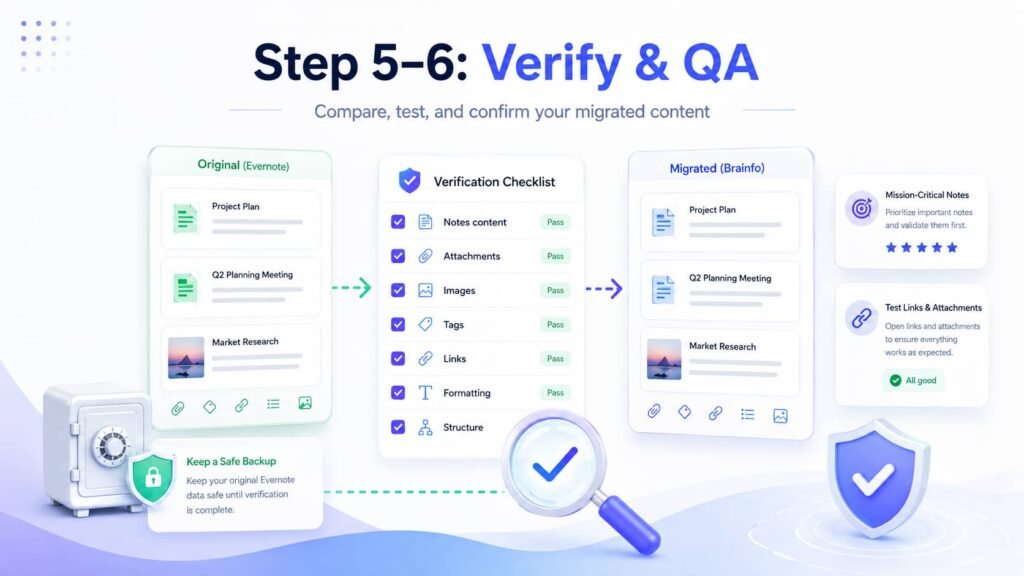
Compare Original and Migrated Notes
Select representative notes from your original Evernote library and compare them with their versions in Brainfo.
You don’t necessarily need to manually compare every note, but important content deserves closer inspection.
Check Important Content Manually
Prioritize:
Test Attachments and Links
Open important attachments rather than assuming they transferred correctly.
Likewise, test important links.
A successful text import doesn’t necessarily guarantee that every related asset behaves exactly as it did in Evernote.
Don’t Delete Evernote Yet
Keep your original Evernote data until the migration has been verified.
A good rule is:
Migration isn’t complete until the migrated knowledge has been checked.
Once you’ve confirmed that your important information is present and usable, you can decide what to do with your old Evernote account and data.
What If You Want to Migrate from Evernote to Another App?
Brainfo isn’t the only possible destination for your Evernote data.
Depending on your workflow, you may also encounter migration paths such as Evernote to Google Keep, Evernote to Apple Notes, Evernote to OneNote, Evernote to Obsidian, Evernote to Notion, Evernote to Joplin, or Evernote to UpNote.
Searches such as Evernote to OneNote migration on Mac, Evernote to OneNote migration tool, and Evernote to Google Keep migration reflect different destination-specific workflows.
The important principle is the same regardless of the destination: check the supported formats, test a small batch, verify the imported content, and keep your original data until you’re confident the migration worked.
If you’re specifically considering Brainfo as your destination, the migration process above gives you a structured way to move from your existing Evernote knowledge base to a new workspace.
Why Move Your Knowledge Base to Brainfo?
The value of a migration isn’t just getting your old notes out of Evernote. It’s creating a knowledge environment that works better for the way you work now.
Brainfo brings notes, documents, organization, search, and AI-assisted workflows together in one workspace.
That means your migration can be more than a file transfer. Once your existing knowledge is in Brainfo, you can organize it around your current projects and workflows rather than continuing to maintain a structure that was built years ago.
If you’re evaluating Brainfo as your next knowledge workspace, you can also learn more about it as an Evernote alternative before deciding how much of your existing library you want to move.
Frequently Asked Questions
Can I migrate from Evernote to Brainfo?
You can move your Evernote content into Brainfo using a supported import workflow. The exact steps depend on the format of your exported Evernote data and the import formats currently supported by Brainfo. Test a small batch before migrating your entire library.
What is the best way to migrate Evernote notes?
The safest approach is to back up your original data, export the notes you need, clean and prepare the export, test a small batch, import it into your destination, and verify important notes, attachments, links, and formatting.
Do I need an Evernote migration tool?
Not necessarily. Whether you need a dedicated migration tool depends on the format of your Evernote export and the import capabilities of your destination. If the formats aren’t directly compatible, a conversion step may be necessary.
Can I migrate Evernote attachments?
Attachments can require additional verification during migration. Identify your important files before starting and manually check them after importing them into your new workspace.
Can I migrate Evernote tags?
Tags may require additional organization depending on how the destination handles categorization. Review your existing Evernote tags before migration and verify the resulting organization afterward.
Should I migrate my entire Evernote library at once?
It’s safer to start with a small, representative batch. Once you’ve confirmed that the migration works correctly, you can move on to a larger portion of your library.
Can I migrate Evernote to OneNote instead?
Yes, Evernote-to-OneNote is another common migration path. The exact process depends on the platforms and versions you’re using. If you’re migrating on a Mac, check the current OneNote and Evernote export/import capabilities before starting.
Can I migrate Evernote to Notion or Obsidian?
Both are possible destinations people consider when leaving Evernote, but each has different organization and import requirements. The same migration principles apply: export, prepare, test, import, and verify.
How do I verify my Evernote migration?
Compare representative original notes with their migrated versions. Check note counts, important content, attachments, images, links, tags, formatting, and organization. Keep your original Evernote data until this verification is complete.
Should I keep my Evernote account after migrating?
You don’t necessarily need to keep using Evernote, but don’t immediately delete your original data. Keep a backup until you’ve confirmed that your new knowledge base contains everything important.
Ready to Move Your Knowledge Out of Evernote?
Migrating from Evernote doesn’t have to mean starting your knowledge base from scratch.
By backing up your data, preparing your notes, testing the import, reorganizing your knowledge, and completing a careful QA process, you can make the transition with much less risk.
If Brainfo is the workspace you’re moving to, start with a small set of notes, verify the workflow, and then scale your migration with confidence.